Safeguard Your Belongings During a Local Move with Smart Penny Moving
Moving locally often carries surprising risks: improper packing, poor loading, and rushed timelines are common causes of damaged items. This guide explains how to prevent damage during a short-distance relocation by combining planning, budget-friendly packing materials, and smart handling strategies to save money and protect valuables. You will learn concrete steps to create an inventory, declutter strategically, choose between DIY and professional help, and apply item-specific packing methods for glassware, electronics, and artwork. The article also breaks down cost-effective materials, furniture protection techniques, moving-day loading and securing methods, insurance choices, and post-move inspection procedures so you can reduce risk without overspending. Throughout, targeted advice addresses local moving tips for damage-free transport, cheap alternatives to specialty supplies, and how to document condition for claims. By following this roadmap you’ll reduce breakage, limit insurance surprises, and preserve valuables while keeping the move affordable.
How Can You Plan Ahead to Protect Your Belongings During a Local Move?
Planning ahead means creating an intentional sequence of tasks that reduces handling risk, consolidates fragile items, and prioritizes time to pack properly. The mechanism is simple: fewer items handled and clearer documentation lower the chance of damage and speed up moving-day decisions. The benefit is lower cost from fewer boxes, less risk of breakage, and clearer evidence for any claim. Good planning ties inventory, decluttering, timing, mover choice, and photo documentation into a single protective workflow.
Creating a short, actionable checklist helps capture the core planning steps before packing and hiring help. Use the checklist below to set priorities and avoid last-minute rushes that increase damage risk.
- Create an itemized inventory with photos and condition notes for high-value items.
- Declutter and sell or donate items you no longer need to reduce handling.
- Decide DIY versus hiring pro movers based on fragility, time, and volume.
- Schedule packing milestones several days before moving day to avoid rush packing.
- Photograph rooms and key items as pre-move evidence for claims.
- Label priority and fragile boxes for clear moving-day placement.
This checklist organizes protective actions into measurable steps, which leads directly into why an inventory is foundational for preventing damage and supporting claims.
Why Is Creating a Detailed Inventory Important for Damage Prevention?
A detailed inventory is a precise record: it lists items, documents condition, and links photos to each object to simplify tracking and claims. The mechanism is documentation—clear timestamps and condition notes reduce disputes and speed claim adjudication if damage occurs. Using an inventory prioritizes packing effort for fragile and high-value pieces and reduces the chance an item is overlooked. For practical use, include fields for item name, room, condition notes, estimated value, and at least one photo with date.
An inventory also creates a semantic map of possessions that can be used to allocate packing materials and time more efficiently, which naturally leads into how decluttering reduces moving risks and costs.
How Does Decluttering Reduce Moving Risks and Costs?
Decluttering reduces the number of items that must be handled, which directly reduces exposure to drops, scratches, and packing errors during a local move. The mechanism is volume reduction: fewer boxes and furniture pieces shorten loading time, lower labor needs, and can shrink required truck space and supplies. The financial benefit is tangible—fewer materials and less labor mean lower out-of-pocket costs for both DIY and professional options. Practical rules include sorting items into keep, sell, donate, and discard piles and estimating how many boxes you save by removing each category.
A clear declutter plan also makes the DIY vs professional mover decision simpler by clarifying volume and fragility, which is the next key consideration.
What Should You Consider When Choosing Between DIY and Professional Movers?
Choosing between DIY and professional movers requires weighing cost, time, item fragility, and insurance coverage to decide which option lowers overall risk. The mechanism is risk-transfer versus self-management: pros accept responsibility and carry insurance while DIY saves money but shifts damage risk to you. Consider total cost (truck rental, materials, time), the number of heavy or fragile items, stair/parking constraints, and your comfort with lifting and securing loads. Verify any professional mover’s licensing and insurance and compare those guarantees to your self-protection plan.
Understanding these trade-offs points to a practical option for local moves: professional services that include packing and transparent pricing when you need trained handling and clearer liability coverage.
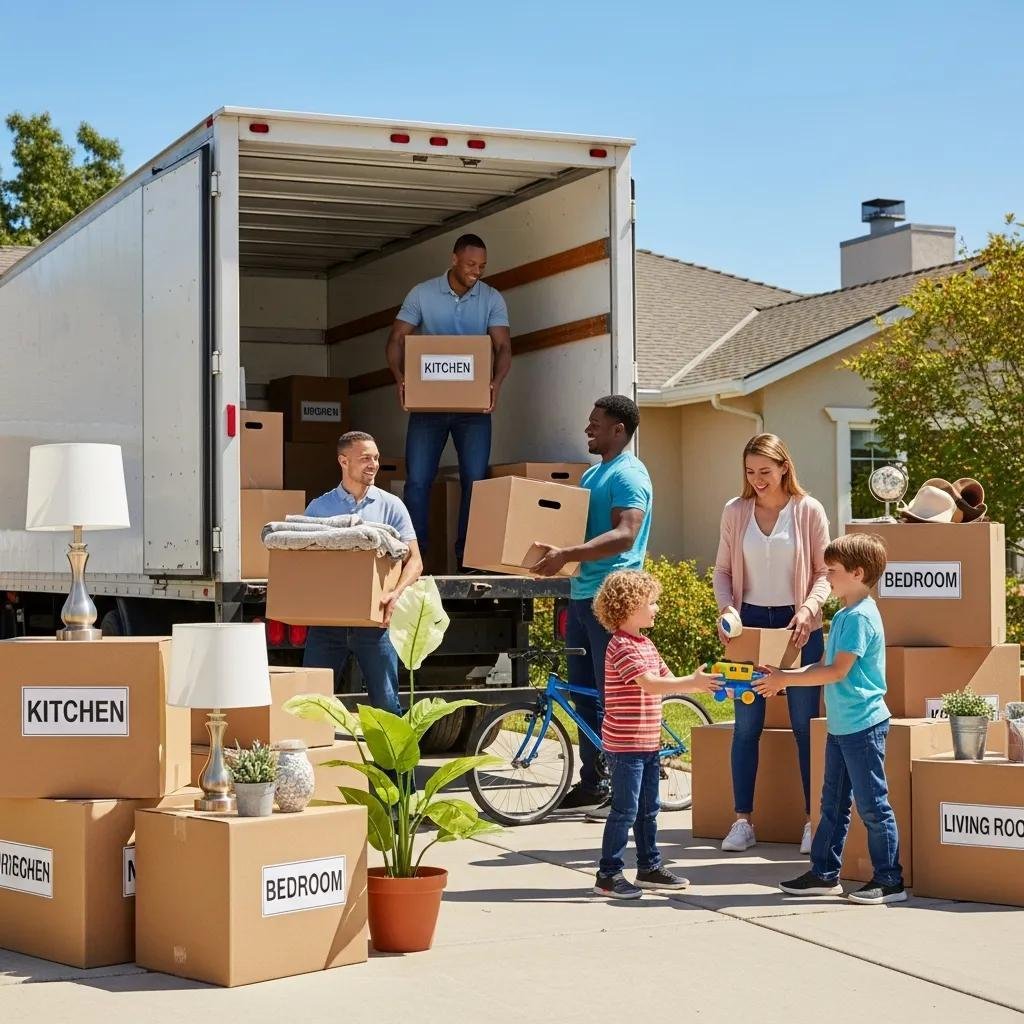
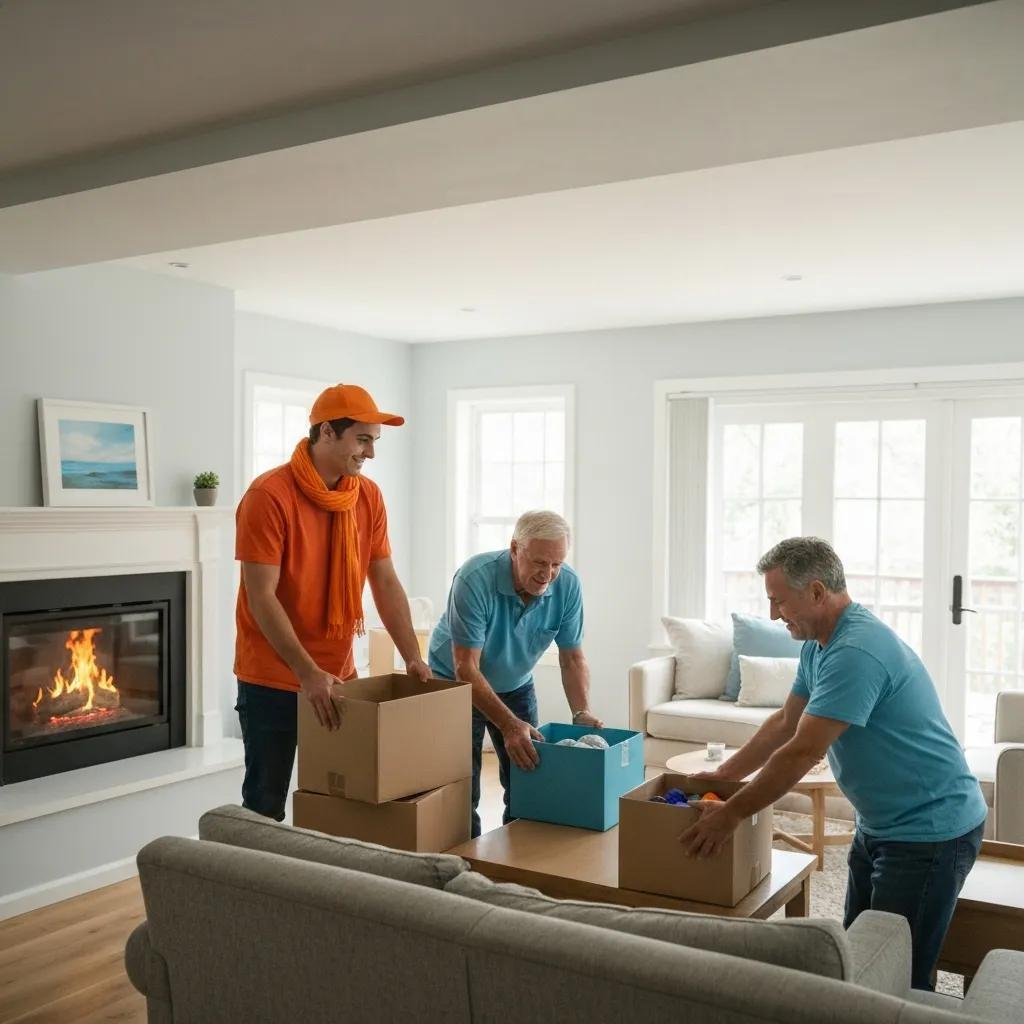
How Can Smart Penny Moving’s Local Moving Services Help Protect Your Items?
Smart Penny Moving offers Local Moving Services designed to reduce handling mistakes by supplying trained movers and insured handling as part of the service offering. The mechanism here is professional handling combined with transparent pricing and optional packing services that reduce homeowner workload and packing errors. For local moves with fragile furniture or tight timelines, choosing trained movers can reduce the probability of scratches, improper truck loading, and mishandled items. Requesting a free quote lets you compare the service level and cost against DIY plans to decide whether professional support fits your budget and protection needs.
Mentioning professional packing and local moving services naturally leads into cost-effective packing materials and when hiring packing services saves time and risk.
What Are the Best Cost-Effective Packing Materials and Supplies for a Local Move?
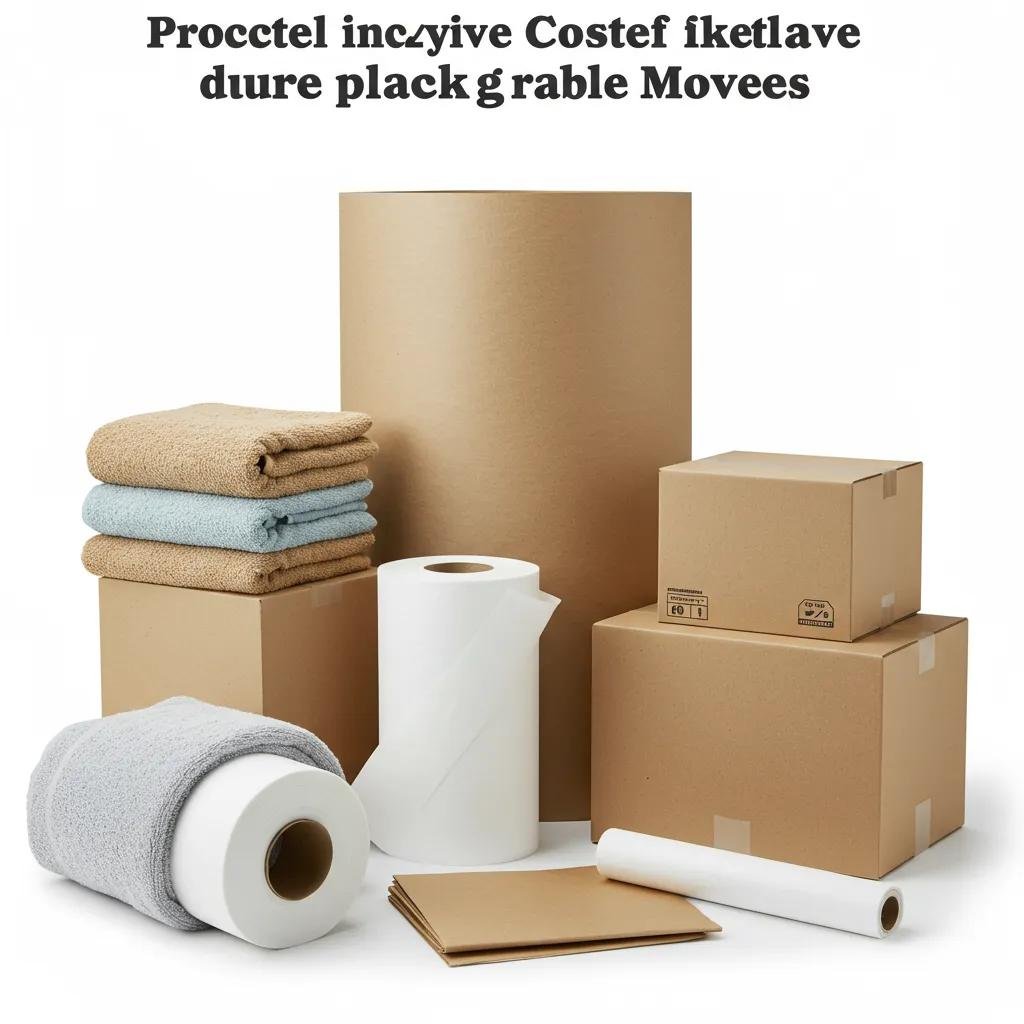
Cost-effective packing balances low upfront expense with sufficient protection for the most-at-risk items, using household soft goods and targeted specialty materials where value demands. The mechanism is substitution: towels, clothing, and packing paper can replace expensive supplies for many fragile objects, while targeted purchases protect the most vulnerable. Benefits include lower spend, reduced waste, and scalable investment—buy less for low-risk items and invest in specialty protection for valuables.
Below is a compact comparison of budget packing materials to help select the right mix of cost and protection for your local relocation.
Which Budget-Friendly Packing Materials Protect Fragile Items Safely?
Many common household items double as effective, budget-friendly padding that reduces the need for specialty supplies. Towels, clothing, and linens provide layered cushioning and can be arranged to absorb shocks for dishes and ceramics, while packing paper can wrap individual pieces to avoid abrasion. Use small boxes to limit weight, fill voids with crumpled paper or fabric, and reserve bubble wrap for the most delicate or high-value items. This layered strategy lowers cost while maintaining essential protection.
How Can You Source Free or Low-Cost Moving Boxes and Supplies?
Finding free or inexpensive boxes starts with local sources and community exchanges that often yield sturdy containers at no cost. Grocery and liquor stores frequently have robust boxes, online community marketplaces and freecycling groups offer used boxes, and local retailers may set aside boxes for pickup. When reusing boxes, inspect for water damage, broken flaps, and structural weakness; reinforce with tape and replace bottoms as needed. Sanitizing boxes and reinforcing corners extends life and reduces the chance of collapse during a move.
Sourcing supplies affordably pairs with eco-friendly and reusable options—consider rentals for plastic bins when moving many heavy items.
What Are Eco-Friendly and Reusable Packing Options for Moving?
Eco-friendly moving options include renting reusable plastic bins, using washable linens for padding, and choosing recycled cardboard or biodegradable packing paper. The mechanism is reuse and reduced landfill impact: renting bins shifts the cost into a short-term rental while eliminating single-use waste. Benefits include lower long-term cost if you move often, less trash after the move, and stronger protection for heavy or valuable items. Consider rental programs for large local moves and combine linens and paper for daily padding to maximize eco benefits.
This sustainability choice leads into practical taping and layering techniques that keep lightweight solutions effective.
How Do You Properly Use Packing Tape, Paper, and Blankets to Prevent Damage?
Proper layering combines materials to control abrasion and shock: first wrap with paper to separate surfaces, add padding for impact absorption, then secure with tape or blankets. Use an H-tape pattern on box bottoms to prevent splitting, double-wrap seams on heavier boxes, and apply moving blankets around furniture followed by stretch wrap to keep padding in place. Avoid overpacking boxes to maintain box integrity and indicate orientation with clear “This Side Up” labels. These techniques reduce punctures and surface scratches while preserving box strength.
A focused comparison of materials and a practical table clarifies trade-offs and guides purchases for furniture protection in a local move.
How Do You Pack Fragile Items Safely for a Local Move?
Packing fragile items requires item-specific technique, layering protection, and limiting box weight to prevent internal collisions and pressure damage. The mechanism is isolation: each fragile object should be individually wrapped, cushioned in a properly sized container, and prevented from shifting during transport. The outcome is fewer breakages, easier unloading, and clearer condition documentation for high-value pieces. Applying standardized steps for glassware, electronics, and artwork reduces handling errors and improves the odds of damage-free delivery.
The next sections break down exact methods for glassware, electronics, artwork, and labeling so you can replicate them step by step.
What Are the Step-by-Step Methods to Pack Glassware and Ceramics?
Packing glassware and ceramics starts by selecting small, sturdy boxes and wrapping each piece individually to prevent contact. First, line the box bottom with cushioning, then wrap each item with packing paper or soft cloth, placing wrapped items upright and not too tightly packed. Use dividers or dish packs when available, fill gaps with crumpled paper or towels, and seal with strong tape while marking the box as fragile and upright. Limit each box’s weight to prevent crushing and place fragile boxes on top during loading.
These steps minimize contact damage and make unpacking safer, and now we’ll cover electronics protection.
How Should You Protect Electronics Like TVs and Computers?
Electronics require protection from shock, static, and cable strain: use original boxes when available, anti-static wrap for circuit boards, and padding that prevents direct pressure on screens. Remove batteries when recommended, label and bag cables with photographed connections, and transport flat-screen TVs upright with ample cushioning on all sides. Document serial numbers and photos before packing to support any claim, and avoid stacking heavy items on top of electronic boxes. These precautions reduce screen cracks, internal damage, and tangled cables after arrival.
Electronics protection strategies inform the next section on artwork and mirrors, which demand rigid backing and corner protection.
What Packing Techniques Work Best for Artwork and Mirrors?
Artwork and mirrors benefit from rigid support and corner protection to resist puncture and flexing during transit. Use specialized mirror/flat packs or create a rigid backing with cardboard sheets, wrap with foam or paper, add corner protectors, and seal with edge guards before placing in a suitably sized box or crate. For high-value pieces, professional crating provides controlled rigid support; for lower-value items, layered protection and careful placement in truck reduce risk. Secure hanging hardware separately and label frames clearly to ensure correct orientation during handling.
After wrapping, labeling and organization help movers handle fragile boxes with the correct priority.
How Can You Label and Organize Fragile Boxes for Easy Handling?
Effective labeling combines room designation, fragility marker, content summary, and handling orientation on every box to minimize misplacement and mishandling. Use consistent color-coded stickers or bold markers, number boxes and keep a master inventory mapping numbers to contents, and mark “Open First” for critical items to be unpacked immediately. Place labels on multiple sides and include top arrows for orientation; communicate special handling instructions to helpers or movers before loading. This clarity reduces the risk of fragile boxes being stacked under heavy loads or put in wrong rooms.
Clear labeling and organization naturally connect to furniture protection methods covered next.
What Are the Best Ways to Protect Furniture During a Local Move?
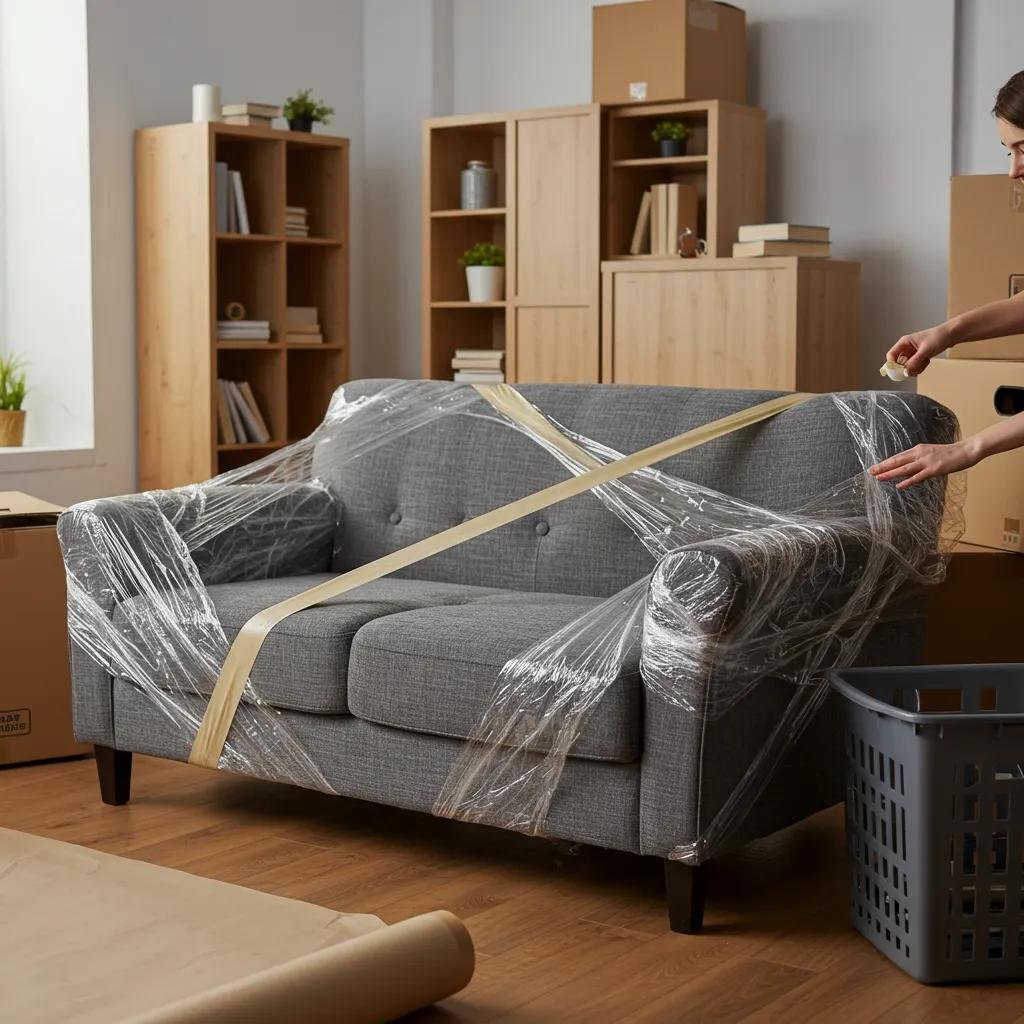
Protecting furniture relies on padding, disassembly where appropriate, and secure truck loading to prevent scratching, denting, and breakage. The mechanism is surface isolation plus immobilization: blankets and pads stop abrasion, disassembly reduces leverage points that break, and proper blocking prevents shifting during transit. The result is preserved finishes, reduced repair needs, and faster reassembly at destination. Employ layered protection and anchoring strategies to minimize movement and contact during a local move.
Below is an EAV-style table to help choose protection methods based on common furniture items and the time/cost trade-offs.
How Do Moving Blankets, Furniture Pads, and Stretch Wrap Prevent Scratches?
Moving blankets and furniture pads create a soft barrier that prevents direct contact and scuffs, while stretch wrap secures padding and keeps drawers and doors closed. The mechanism is cushioning plus containment—blankets absorb surface impact and stretch wrap immobilizes components to avoid rubbing and opening. Applying padding in layers and securing it with stretch wrap keeps furniture protected through handling and transport. Proper use reduces the need for post-move refinishing and maintains resale value.
Layered padding and containment set up the next decision: when to disassemble furniture for safer transport.
When and How Should You Disassemble Furniture for Safer Transport?
Disassembly reduces size and stress on joints, which lowers risk of breakage and makes maneuvering through doorways and stairs easier. Typical disassembly includes removing legs from tables, separating bed rails from headboards, and bagging all fasteners in labeled packets tape—attached to the furniture piece. Keep a set of basic tools and document steps with photos to make reassembly straightforward. Hire professionals for complex antiques or when you lack tools or time to avoid improper reassembly that could damage components.
Knowing when to disassemble informs how to load and secure furniture in the truck to prevent shifting.
What Are Effective Techniques to Secure Furniture in the Moving Truck?
Securing furniture starts with strategic load order—heavy, low items first—followed by using straps, anchor points, and blocking to immobilize items and fill voids. The mechanism is anchoring and weight distribution: straps prevent tipping, and blocking prevents lateral movement during starts and stops. Use ratchet straps anchored to built-in points, place heavy items against the truck wall for balance, and fill gaps with soft items or boxes to avoid shifting. These approaches prevent collisions and reduce the chance of furniture toppling or rubbing against other surfaces.
Once furniture is protected in-transit, home protection measures keep floors and walls safe during move-out and move-in, which we discuss next.
How Can Corner Protectors and Floor Runners Safeguard Your Home and Furniture?
Corner protectors guard door frames and furniture edges from knocks while floor runners shield high-traffic paths from scuffs and dirt. The mechanism is surface coverage: temporary barriers absorb impacts and avoid transferring dirt or moisture onto floors and baseboards. Use adhesive-backed corner protectors on furniture or doorways and lay runners along hallways and staircases to protect finishes during heavy traffic. For high-value flooring or finish-sensitive homes, consider rental-grade protection or professional floor covers to minimize repair risk.
Protecting both furniture and the home during transit ties directly into moving-day practices that prevent damage overall.
How Can You Prevent Damage on Moving Day and Ensure Safe Transport?
Damage prevention on moving day combines correct lifting, strategic load sequencing, secure anchoring, and home protection to maintain item integrity from door to truck to door. The mechanism is coordinated execution: trained handlers, clear instructions, and standardized placement reduce accidental drops and improper stacking. The benefit is fewer dings and breakages, faster unloading, and a smoother claims process if needed. Preparing a moving checklist and coordinating roles will keep day-of activity efficient and damage-free.
Below are loading and unloading best practices to use on moving day and share with helpers or a hired crew.
- Load heavy items first and place them against the truck wall to create a stable base.
- Use two-person lifts and proper ergonomics to avoid dropping items and causing damage.
- Keep fragile boxes on top and clearly separate them from heavy appliances to prevent crushing.
- Communicate placement instructions before each item is moved to avoid confusion at delivery.
These practices reduce incidents on moving day and naturally lead into specific advice for securing items inside the truck.
What Are the Best Loading and Unloading Practices to Avoid Damage?
Safe loading and unloading hinge on team communication, correct lifting mechanics, and clear sequencing to avoid rushed handling that causes drops. Use padded dollies for heavy items, slide rather than lift when possible across short distances, and assign one person to guide placement while another carries the load. Unload priority boxes first to ensure important items are accessible and reduce handling.
These steps lower personal injury risk and prevent accidental collisions that damage furniture and fragile goods.
Once loaded, securing items inside the truck keeps them from shifting during transit, which is covered next.
How Do You Secure Boxes and Items Inside the Moving Truck?
Securing cargo requires anchor straps, blocking, and strategic use of heavier items as natural anchors to prevent shifting and tipping. Attach straps to truck anchor points, loop around grouped items, and apply tension sufficient to prevent movement without crushing packed contents. Use wedges, small furniture pieces, or rolled blankets to fill voids so items cannot slide during transit. Correctly secured loads minimize stress on boxes and coated surfaces and reduce the chance of breakage on local trips with frequent stops.
Securing the truck pairs with home protection measures to safeguard floors and walls during heavy foot traffic.
What Home Protection Measures Should You Use During Moving?
Protect home interiors by installing floor runners, padding door frames, and temporarily removing small fixtures that could be damaged during heavy traffic. The mechanism is barrier creation—temporary covers shield surfaces from scrapes, moisture, and dirt while moving large items through narrow passages. Use adhesive protectors on thresholds and corners and remove rugs that could bunch and cause tripping. These measures protect both your home’s finishes and your furniture as movers navigate tight spaces.
Home protection and securing the truck benefit from a clear moving checklist that coordinates tasks and ensures damage-free handling next.
How Can You Use a Moving Checklist to Stay Organized and Damage-Free?
A moving checklist organizes tasks into pre-move, packing, moving-day, and post-move inspection stages so nothing critical is forgotten under time pressure. Include inventory cross-checks, labeled box priorities, placement plans for movers, and immediate post-move inspection steps to document condition. Share the checklist with helpers or professional crews to align expectations and reduce handling mistakes. This structured approach increases the chance of a smooth, damage-free move and provides documentation support should a claim be necessary.
For moves where loading and handling complexity is high, hiring trained professionals reduces day-of risk and provides insurance-backed handling.
What Are Your Options for Moving Insurance and Damage Protection?
Moving insurance options range from carrier-provided minimal liability to full value protection and independent third-party policies; selecting the right option depends on item value and risk tolerance. The mechanism is risk transfer: insurance shifts financial responsibility for damage, varying in scope and cost across options. The benefit of choosing appropriate coverage is clearer financial recourse if loss or damage occurs during a local move. Understanding each option’s limits and interaction with homeowner or renter policies guides an informed selection.
Below is a comparison table to highlight attributes and appropriate use-cases for common moving protection options.
What Is the Difference Between Released Value and Full Value Protection?
Released value protection limits the carrier’s liability to a nominal amount per pound per item and is low-cost but often insufficient for high-value goods, while full value protection requires a higher premium and typically covers repair or replacement. The mechanism difference is liability calculation: released value uses weight-based limits; full value uses declared value or replacement cost. Use released value for inexpensive, easily replaceable goods and full value for fragile, costly items that would be difficult to replace. Comparing the two clarifies out-of-pocket exposure if damage occurs.
When Should You Consider Third-Party Moving Insurance?
Third-party insurance is useful when moving antiques, artwork, or jewelry that exceed carrier coverage limits or when special perils are excluded by standard policies. The mechanism is policy customization—third-party insurers allow tailored limits and specific endorsements for unusual risks. Consider this option if you have items with high collectible value, gaps in provider coverage, or if you need quicker claims turnaround. Document condition extensively and obtain appraisals where necessary to support third-party claims.
How Does Homeowners or Renters Insurance Cover Moving Damage?
Homeowners and renters policies sometimes provide limited off-premises coverage but often exclude damage during professional transport unless specifically endorsed. The mechanism depends on policy language: some policies extend protection during transit while others limit to named perils or require rider coverage. Review your policy details for off-premises and transit coverage and coordinate with mover coverage to avoid duplicate gaps. Verifying these interactions before moving prevents unpleasant surprises during a claim.
How Can You File a Moving Damage Claim Effectively?
Filing a moving damage claim requires immediate documentation: photos with timestamps, the inventory reference, and prompt notification to the mover or insurer within the carrier’s reporting window. The mechanism is evidence accumulation—complete records shorten claim resolution and reduce disputes. Prepare a timeline of events, retain all receipts and communications, and keep damaged items until the claim process completes. Use concise, factual language in claim submissions and follow up regularly to track progress.
Having a clear claims workflow connects to post-move inspection steps you should take immediately after arrival.
What Should You Do After Your Local Move to Check for Damage and Protect Your Belongings?
Post-move inspection is a systematic room-by-room review that documents condition, isolates damaged items, and initiates any needed claims or repairs within carrier timelines. The mechanism is verification and remediation: catching issues early preserves evidence and speeds recovery. Benefits include faster resolution, lower repair costs, and clearer negotiation with insurers or movers. Conduct a prioritized inspection focusing on high-value and fragile items first, using your inventory and photo log to compare pre- and post-move condition.
The following sections explain immediate inspection, steps if you find damage, how Smart Penny Moving can assist, and maintenance tips to preserve items after moving.
How Do You Conduct an Immediate Inspection of Your Items?
Conduct a room-by-room inspection starting with high-value and fragile items, comparing current condition to your pre-move inventory photos and notes. Photograph any anomalies with context and timestamps, list damaged items with brief descriptions, and gather any witnesses or delivery paperwork. Maintain a chronological log of discoveries and keep damaged items in the condition found to support claims. Prompt inspection ensures you meet carrier reporting deadlines and preserves evidence quality.
What Steps Should You Take If You Find Damage?
If you discover damage, isolate the damaged item, photograph it from multiple angles, and locate the original inventory entry for comparison before contacting the mover or insurer. Notify the mover immediately per their claims process and submit photos, receipts, and the inventory reference within the required timeframe. Keep copies of all correspondence and avoid disposing of damaged items until the claim is settled. Timely, organized action increases the likelihood of a favorable resolution.
For customers of Smart Penny Moving, the company offers post-move support to streamline reporting and follow-up.
How Can Smart Penny Moving Support You After the Move?
Smart Penny Moving provides customer support for damage reporting, assistance with claim documentation, and follow-up services like short-term storage or re-packing when needed to resolve post-move issues. The mechanism is customer service and logistical support that helps clients document condition, gather evidence, and understand coverage options. If you used Smart Penny Moving – Local Moving Services or Smart Penny Moving – Packing Services, their team can assist with providing service records and guidance on next steps. Contacting their support early ensures coordinated resolution and can simplify the claims workflow.
After resolving immediate issues, follow simple maintenance steps to keep belongings in top condition in the weeks after your move.
What Are Tips to Maintain Your Belongings After Moving?
After a move, perform a 30/60/90-day maintenance checklist: tighten furniture joints, allow electronics to acclimate before powering, and check for hidden damage after settling. The mechanism is preventive care—small adjustments and inspections catch issues that may appear after transit stress relaxes. Clean and condition finishes, inspect upholstery, and schedule any needed repairs promptly to avoid further deterioration. Regular follow-up preserves functionality and appearance and reduces long-term repair costs.
This post-move care completes a damage-prevention lifecycle that starts in planning and includes protective materials, handling practices, insurance choices, and documentation to keep your local move affordable and damage-free.
Frequently Asked Questions
What are the most common mistakes to avoid during a local move?
Common mistakes during a local move include inadequate planning, poor packing techniques, and failing to label boxes properly. Many people underestimate the time required for packing and organizing, leading to rushed decisions that can result in damaged items. Additionally, neglecting to use appropriate packing materials or overloading boxes can increase the risk of breakage. To avoid these pitfalls, create a detailed checklist, allocate sufficient time for each task, and ensure that fragile items are packed securely and labeled clearly.
How can I ensure my fragile items are packed correctly?
To pack fragile items correctly, start by using small, sturdy boxes and wrapping each item individually with packing paper or bubble wrap. Place cushioning material at the bottom of the box and ensure that items are packed upright and not too tightly to prevent shifting. Fill any gaps with crumpled paper or soft cloth to minimize movement during transport. Clearly label these boxes as “fragile” and indicate the correct orientation to ensure careful handling during the move.
What should I do if I find damage after my move?
If you discover damage after your move, immediately document the condition of the item with photographs and notes. Compare the current state to your pre-move inventory and take note of any discrepancies. Contact your mover or insurance provider as soon as possible to report the damage, providing them with the necessary documentation. Follow their claims process, keeping copies of all correspondence and retaining the damaged item until the claim is resolved to support your case.
How can I make my moving day more efficient?
To make your moving day more efficient, create a detailed plan that includes a timeline and designated roles for helpers. Load heavy items first and place them against the truck wall for stability. Use proper lifting techniques and communicate clearly with your team to avoid confusion. Prioritize unloading essential items first and ensure that fragile boxes are handled with care. A well-organized moving day reduces stress and minimizes the risk of damage to your belongings.
What are some eco-friendly moving practices I can adopt?
Adopting eco-friendly moving practices can include using reusable packing materials, such as plastic bins or washable linens, instead of single-use cardboard boxes. Sourcing packing supplies from local stores or community exchanges can also reduce waste. Additionally, consider renting moving supplies and using biodegradable packing materials. After your move, recycle or donate any unused packing materials to minimize your environmental impact and contribute to sustainability efforts in your community.
How can I prepare my new home for moving in?
Preparing your new home for moving in involves several steps to ensure a smooth transition. Start by cleaning the space thoroughly before your belongings arrive. Consider measuring doorways and hallways to ensure that larger furniture can fit through easily. Set up a designated area for unpacking and organizing items as they come in. Additionally, ensure that utilities are set up and functioning, and consider making any necessary repairs or improvements before moving in to create a welcoming environment.
What are the benefits of hiring professional movers versus DIY moving?
Hiring professional movers offers several benefits over DIY moving, including expertise in handling heavy and fragile items, access to specialized equipment, and insurance coverage for your belongings. Professionals can efficiently pack, load, and transport your items, reducing the risk of damage and injury. While DIY moving may save money, it often requires significant time and effort, and the risk of damage or injury can lead to unexpected costs. Weighing these factors can help you make the best decision for your move.
Conclusion
Successfully protecting your belongings during a local move involves strategic planning, effective packing techniques, and the right insurance coverage to minimize risks. By implementing these tips, you can ensure a smoother, more affordable moving experience while safeguarding your valuables. Take the next step by exploring our comprehensive moving services and resources to make your transition even easier. Start your journey towards a damage-free move today!